Uploading data by .csv file
Importing contacts into Action Network
You will need admin access to your group on Action Network and a computer with Excel installed (free alternatives to Excel include Open Office and Libreoffice). This section is tricky, if you are having trouble or don’t understand get in contact with tech@rebellion.earth who will be able to help you.
The first thing to do is to export your contacts into a CSV (Comma Separated Values) file. There should be an option to download contacts in your current tool, and choose the file option as a CSV. In Mailchimp this is “Export Audience”. Open this in Excel, it should look something like the below.
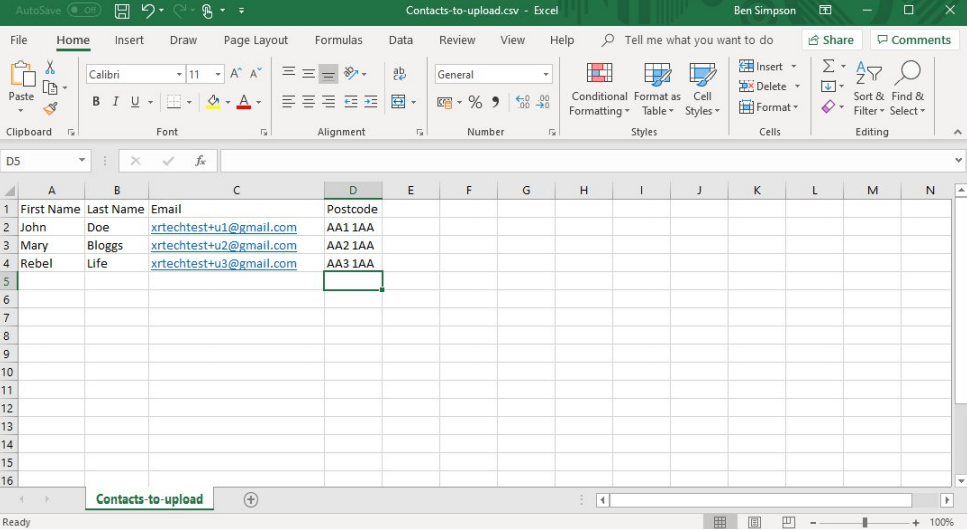
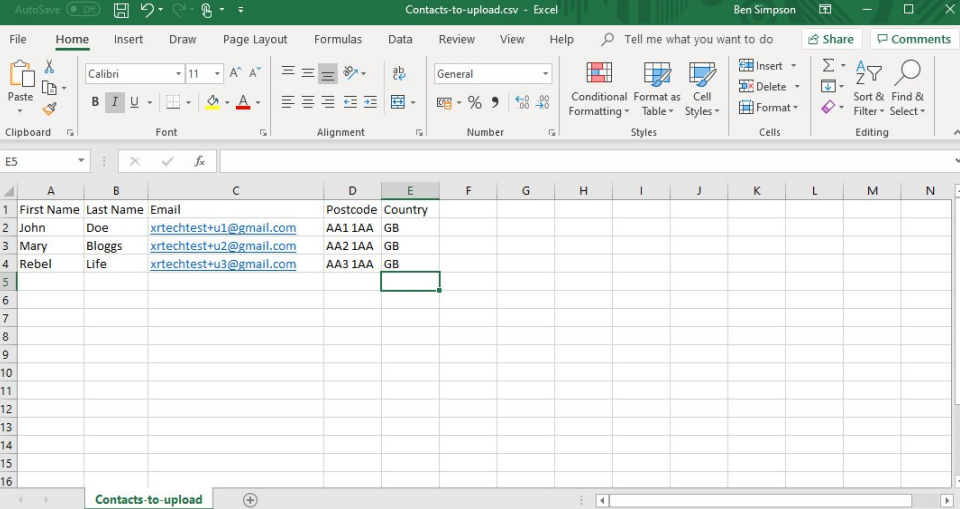
If you have additional fields, such as address, it is please delete all columns except Names, Emails and Postcodes. Also make sure that the data looks sensible. Once this is done add a new column called Country, with value GB.
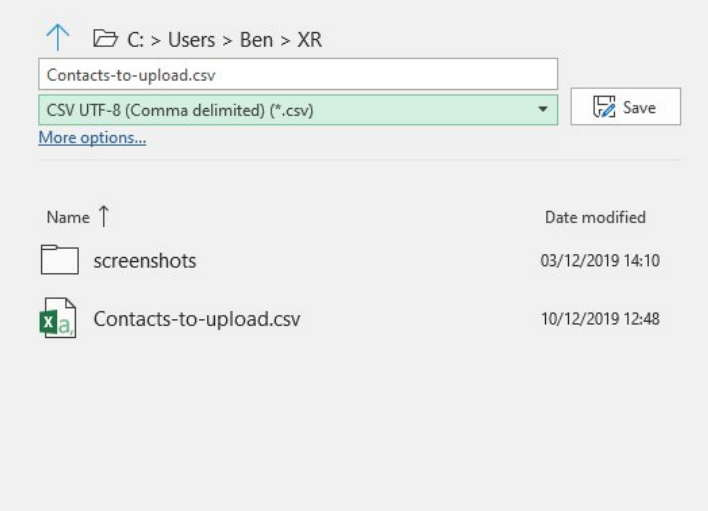
In Excel go to File>Save as and pick a sensible file name. Also make sure that the file type is .csv.
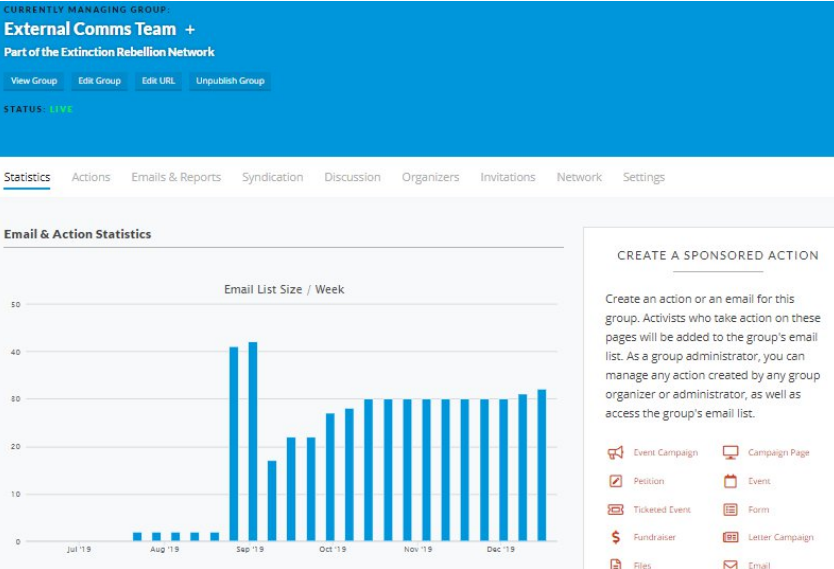
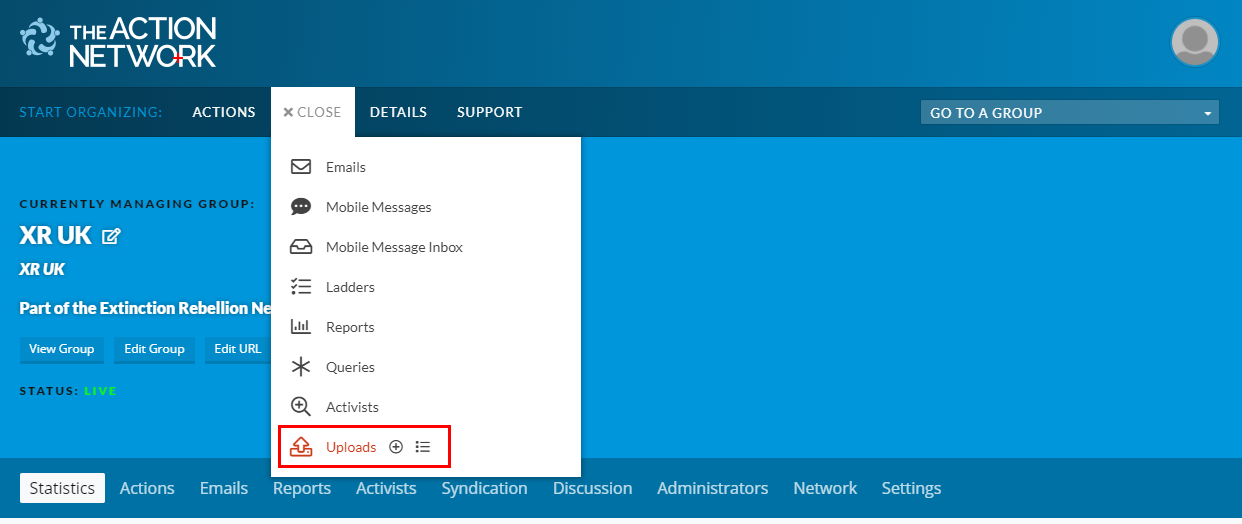
Now in Action Network hover over the menu button at the top left and click People>Uploads.
Very Important - make sure that the “Currently Editing” is the group that you want to upload the new activists to. It should default to that but if you manage more than one group, make sure this is correct. If not you are in breach of GDPR as you will be adding people to mailing lists they haven’t opted in to.
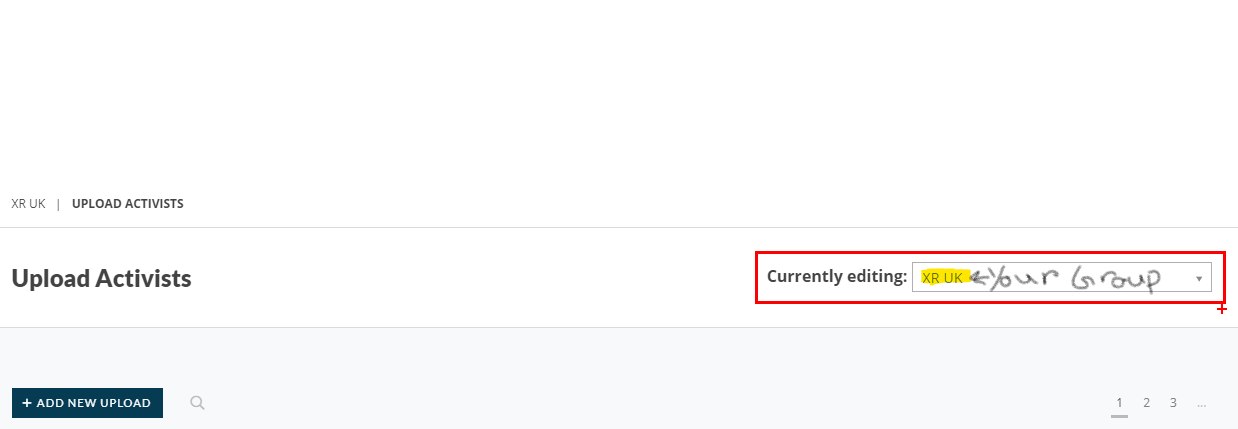
Once the “Currently Editing” is correct click Add new Upload, which brings up the following screen
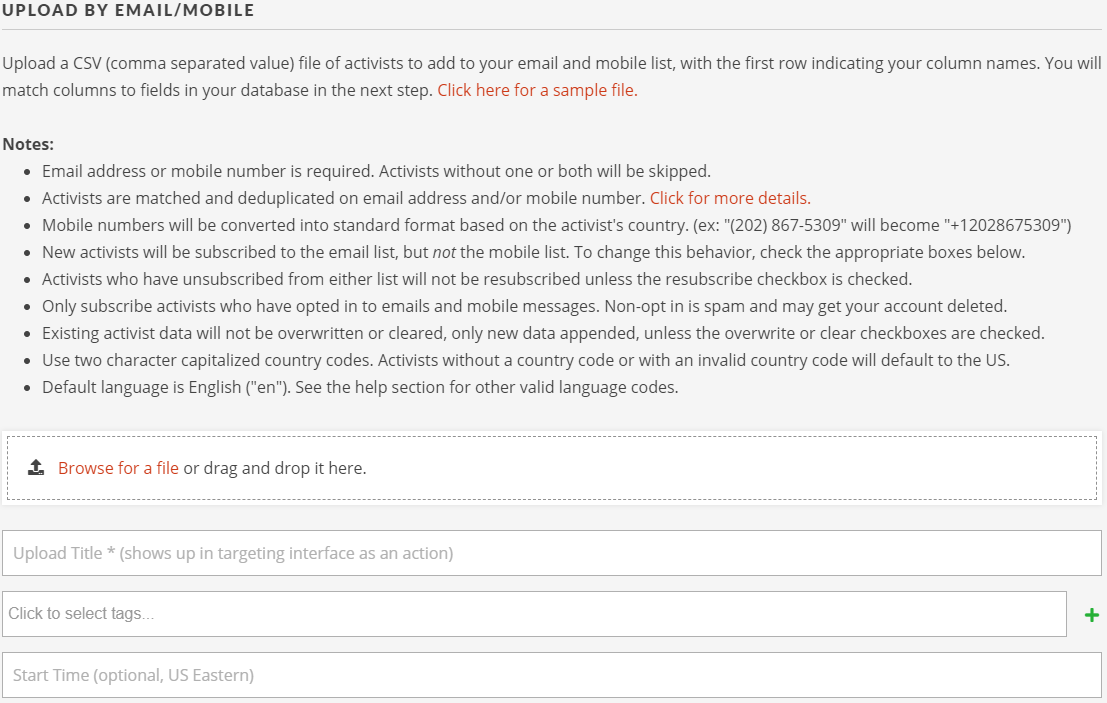
Choose Upload by email, browse and add the file you created earlier, give a title such as “Import from Mailchimp April 12 2021” and leave all other boxes and options the default. Click Upload and Match Fields. This takes you to the following screen
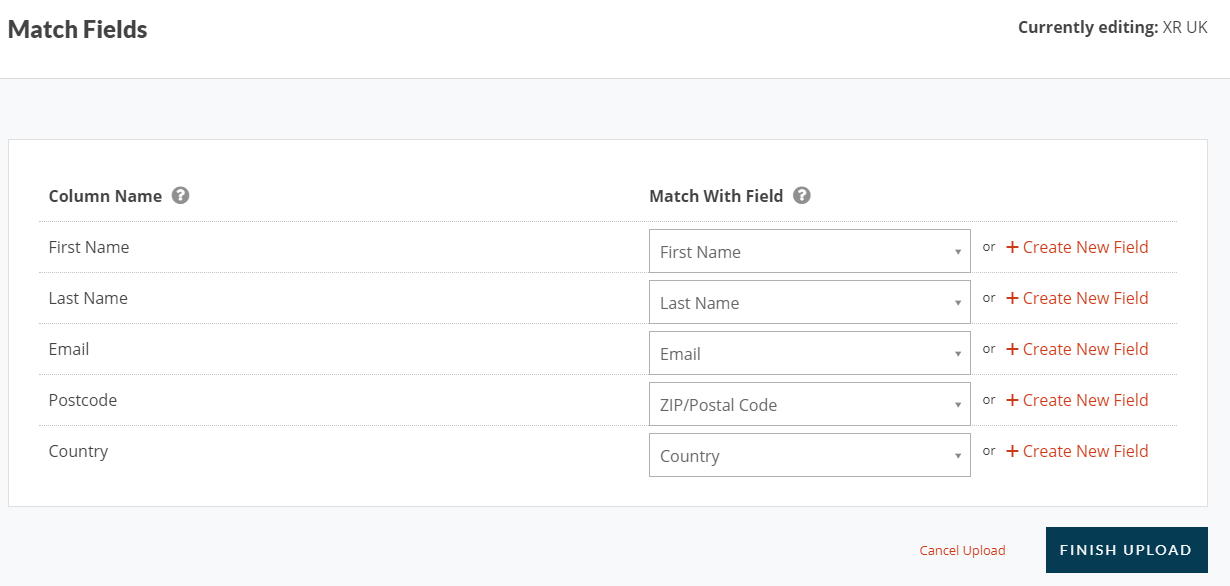
Click Finish Upload. This completes your upload of the data.